
The Recipe Explosion module offers a great way to generate shopping lists, ingredient requirement forecasts and can tell you how much of each ingredient in your inventory should have been used based on your sales or production.
In this tutorial we’ll show you different ways to input your recipe yields or menu items to be exploded into their ingredients, how to halt the explosion at stocked (or inventoried) sub-recipes and the different reports that can be generated.
Let’s start with a shopping list. In this example, we’re a caterer who is planning for a big event. The client has approved the menu and provided us with the number of guests.
Here’s menu and quantities:
- Nachos – 110 servings
- Broiled Scallops – 110 servings
- Large Rolls – 220 each
- Cheesecake – 110 servings
- Bananaman Crepe – 110 servings
Now we need to figure out the quantity of each ingredient we need to purchase so our kitchen can prepare the food needed. We’re on a tight budget so we don’t want to buy more then we need. So, we’ll use the Recipe Coster and its Explosion module to generate a shopping list of ingredients our kitchen will need for this event.
Log into the Recipe Coster and switch to ‘Recipe Explosion’.
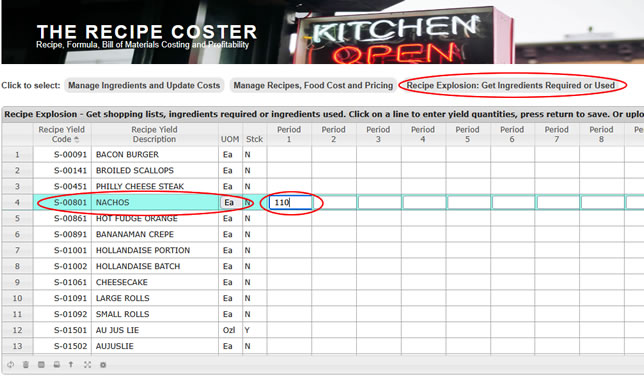
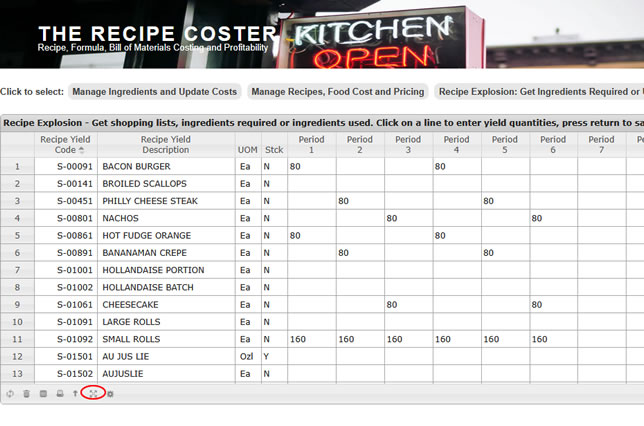
Once you are on the Recipe Explosion screen click on ‘Nachos’ and the line opens for data entry. Enter ‘110’ in the first column, press Return and the entry is accepted. Now click on ‘Broiled Scallops’ and enter ‘110’ and press Return. Continue until you’ve entered the rest of the event menu.
(Note that you can change the unit of measure, if desired. Just click on the unit of measure and you can choose from any of the allowed measures of the same type.)
After entering the menu items for the event the screen should look like this:
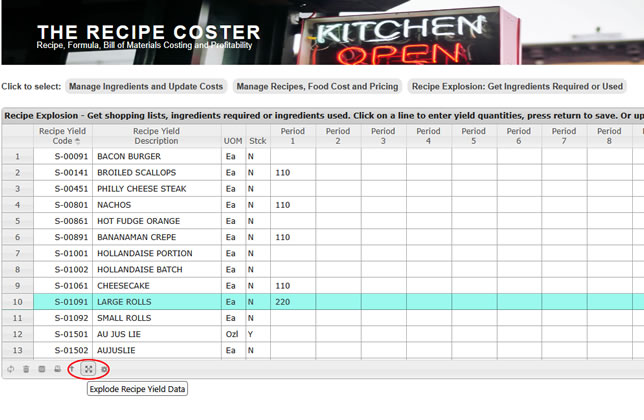
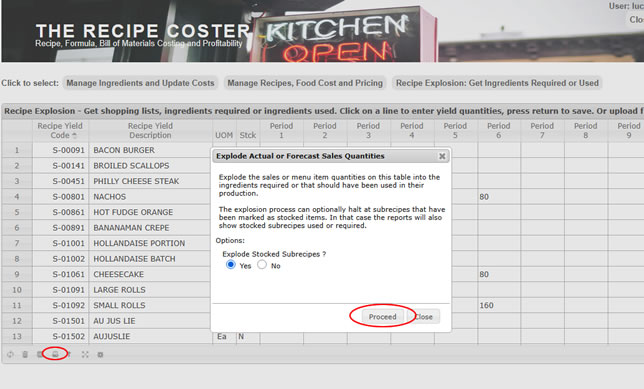
Now that we’ve entered all of the menu items needed for the event we can proceed with exploding into the required ingredients. Click on the ‘explosion’ icon at the bottom of the screen.
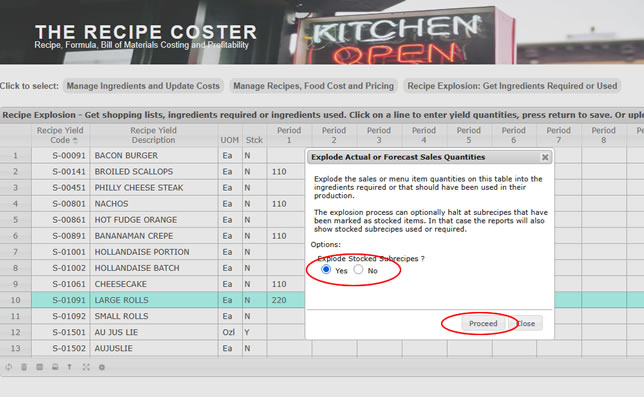
We’re asked if we want to ‘Explode Stocked Subrecipes’. Answer ‘Yes’.
We might have answered ‘No’ if the recipes used in our menu included sub-recipe ingredients that our kitchen makes in quantity and inventories in advance. An example of a stocked subrecipe might be the Refried Bean Mixture used in the Nacho Topping for the Nachos. We might want the explosion process to halt at Refried Bean Mixture and just tell us how much of that subrecipe we’ll need.
To continue, click on ‘Proceed’.
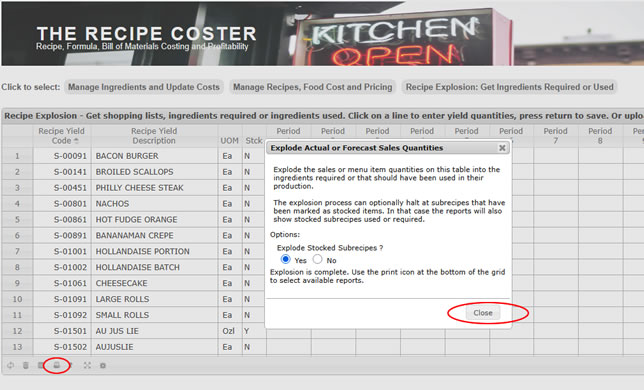
The explosion completes and we can close the dialog box.
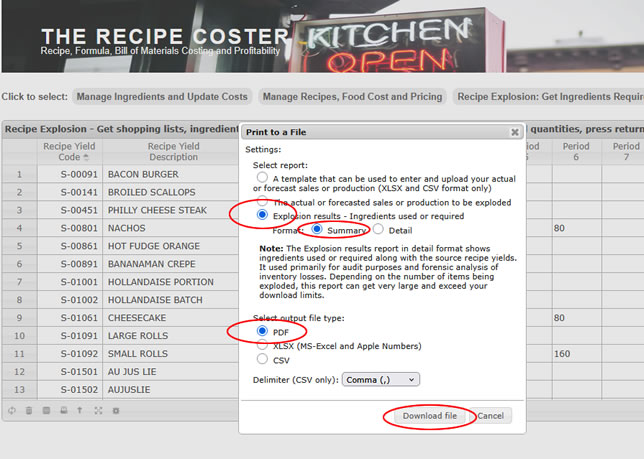
Let’s see what our shopping list looks like. Click on the ‘Print Report’ icon.
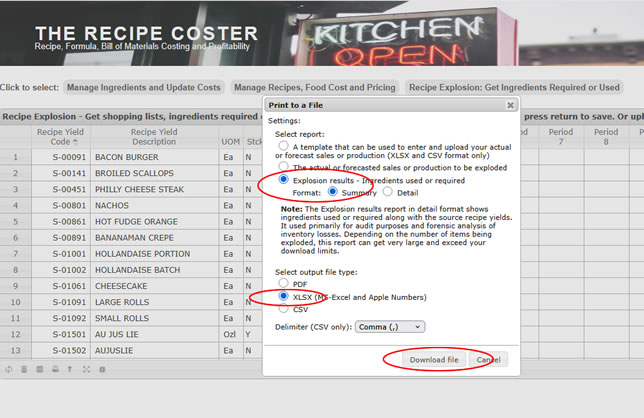
The ‘Print to a File’ dialog box opens with the printing options. Select ‘Explosion Results’ in ‘Summary’ format with the output in an XLSX file which can be opened in Microsoft Excel and Apple Numbers.
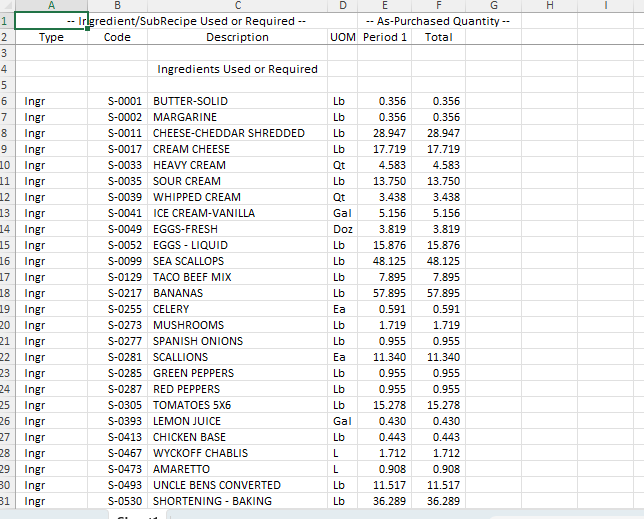
Here is the ‘Shopping List’ in spreadsheet format:
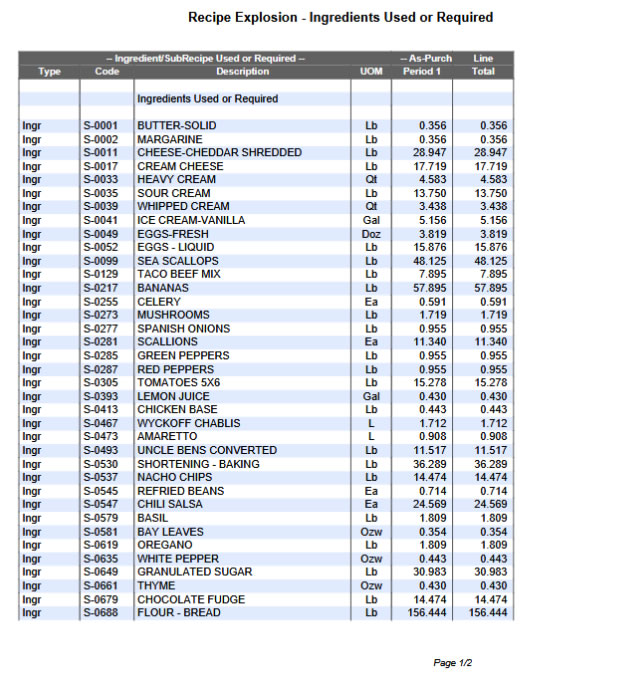
Here’s the same report in PDF format:
For our next example, we’ll take the case of a summer camp kitchen manager who needs to plan ingredient purchases for a six week camping session. We’ll use the forecast template in MS-Excel (XLSX) format and enter the six week meal plan. Then we’ll upload the template, explode it and get our ingredient requirements by week.
First, let’s clear the forecast and then download the template.
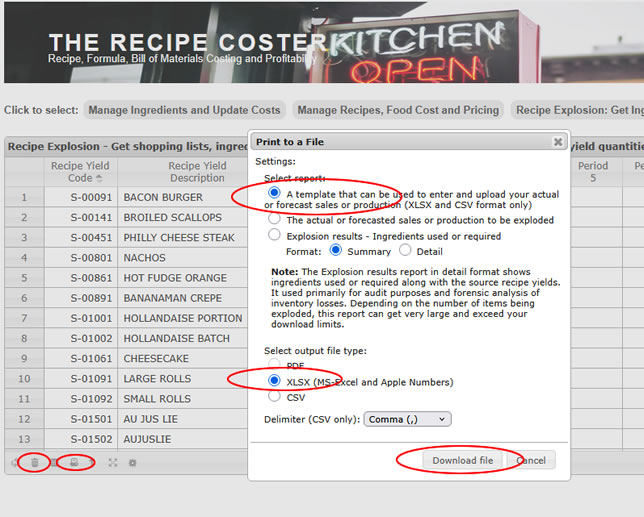
Click on the ‘trash’ to clear the explosion screen and then click on the print icon. In the print dialog box select the template report in XLSX format and then click on ‘Download file’. The explosion template in XLSX format will be downloaded to your PC or device. This report can be opened in Microsoft Excel and Apple Numbers. Here’s what it looks like. We’ve gone ahead and entered the summer camp’s six week menu forecast.

Now we’ll upload this spreadsheet. Click on the Upload icon at the bottom of the Recipe Explosion screen.
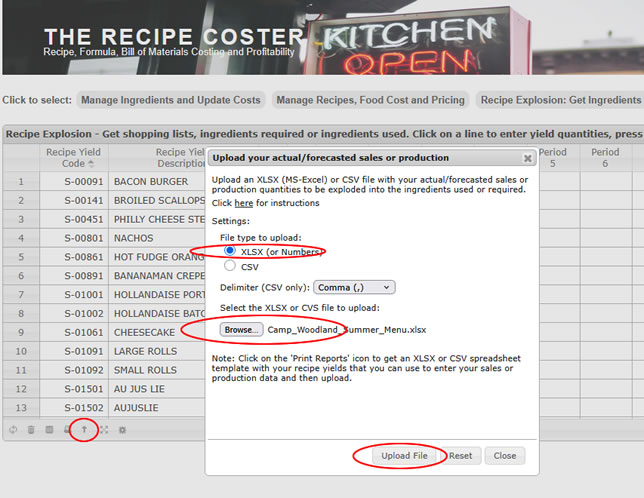
In the Upload dialog box select the file type being uploaded – XLSX. Then click on Browse and find the Summer Camp Menu XLSX file on your PC or device. Lastly, click on ‘Upload File’ to upload the six week menu file.
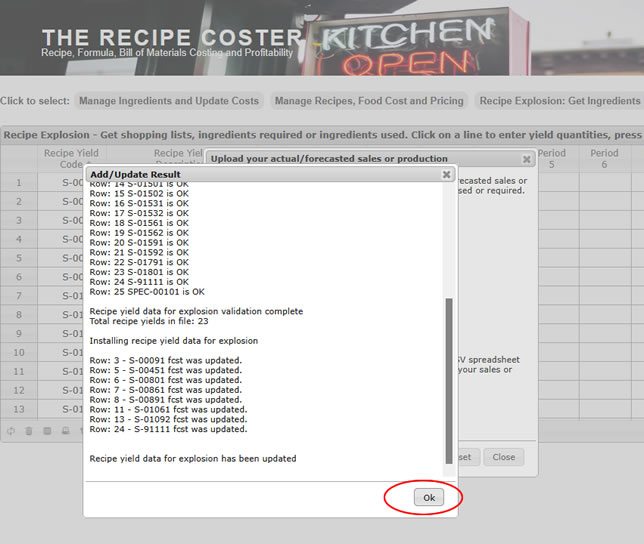
The Recipe Exploder checks and validates each line and populates the explosion table.
And, lastly we’ll explode the menu plan into the ingredient requirements.
And print the results in Summary format as a PDF file.
Here’s the first page of the PDF:

As a final example we’ll discuss how the Recipe Exploder can help with inventory losses due waste or theft.
If you’re like most food service you’re taking a physical inventory monthly in order to calculate cost of goods sold and profit. Your food cost hits your target of 28% and everything is fine. But what happens if your food cost percent suddenly comes out at 35 or 40 percent. If your sales run $200,000 per month you could be looking at a $20,000 inventory loss.
So how do you find the loss? The Recipe Exploder can help by showing you how much of each ingredient item you should have used. Then you can compare this to how much of each high value ingredient your physical inventory along with purchases says you did use. Here’s a simplified example.
Here we’ve uploaded an XLSX spreadsheet with a restaurant’s monthly sales by item.
Now we’ll explode the sales into the ingredients that should have been used and use the detail report that shows which menu items used the ingredient.
Here’s page two of the report. It shows that you should have used 1,500 pounds of ground beef for Bacon Burgers and should have used approximately 1,600 pounds of top round for Philly Cheese Steak sandwiches. But your inventory shows you purchased and used 2,000 pounds of ground beef and another 2000 pounds of top round. Looks like you either have hundreds of pounds of beef walking out the back door or your kitchen is giving excessively generous portions.
Now that you know where the loss is the next step is up to you. A discussion with the kitchen staff and/or add extra controls and reporting over the use ground beef and top round might be appropriate.